miniSIPServer can support writing IVR application in XML file. The latest "Automated attendant" service is writen with IVR_XML, we will describe auto-attendant service and IVR_XML together in this document.
Automated attendant (also auto-attendant) service allows callers to be automatically transferred to an extension without any intervention of a receptionist. For example, auto-attendant feature maybe looks like this "welcome to xxx company. If you want to contact market department, please press 1; Contact support department, please press 2; or just press extension number directly".
Below figure describes a basic network topology for auto-attendant deployment.
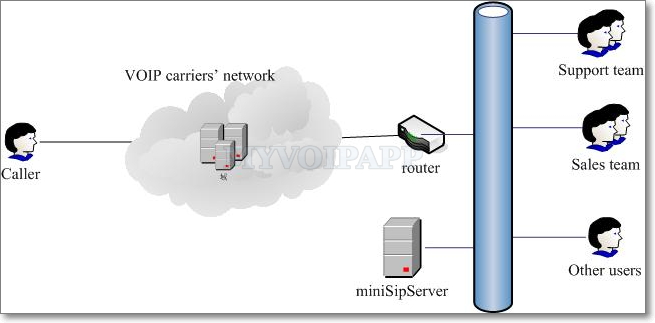
Before you deploy this feature, please confirm you have a VoIP provider account or VoIP gateways to connect outside users.
Here we connect a SIP account in "external line" configuration and enable "auto attendant" at the same time.
Please click menu "data / external lines" and configure an external line.
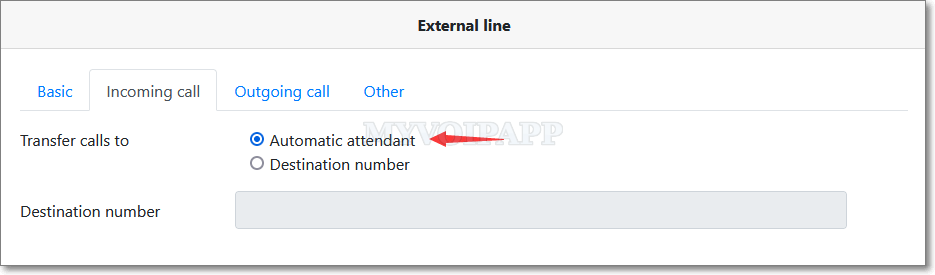
In above figure, we assume the external line number assigned by your VOIP carriers is "2000". The most important is that incoming calls must be transferred to "automatic attendant".
After that, when outside caller or person call "2000", they will hear "Welcome, please enter extension number" announcement and miniSIPServer will route this call to the extension according to their input extension number.
As we have described before, the default announcement for auto-attendant in miniSIPServer is just "Welcome, please enter extension number". In most deployment, we want to change this announcement to our own announcement, such as "Welcome to xxx company, please enter 1 to sales team, enter 2 to support team, or please enter extension number directly".
Can we do that? Yes, of course.
3.1 Customize our own announcement
You can replace it with your own announcement. Please note that the audio codec format must be "G.711A, 8000HZ, 7kb/second" and refer to the online document "How to record my own audio file" for more details.
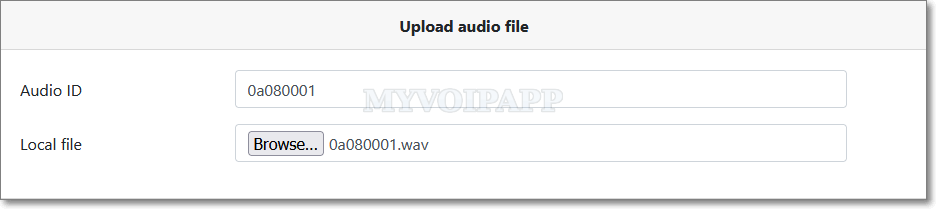
You can upload your own audio files into the virtual server. Please click menu "Profile / System audio file" to upload them.
| Item | Description |
|---|---|
| Audio ID | The audio ID MUST be 8 characters and only 0-9 and a-f are valid. Please refer to the online document for more details about miniSIPServer default audio ID. |
| Local file | Local audio file to be uploaded to the virtual server. The file size must be less than 300KB. |
3.2 Transfer call
In our example, when caller users press "1", we want to transfer the call to sales team. We assume extensions "100", "101" and "102" belong to sales team. We want all these extensions ringing at the same time. Then, we can configure miniSIPServer as below:
- Add local users (extensions) "100", "101" and "102".
- For all of them, please enable ringing-group service and assign the same ring group ID to them.
The default IVR-XML file of auto-attendant is 'aa.xml'. Please click here to view or download it. We can refine it with following modification:
    <action name="inputForMenu1" method="input">
        <digit value="1"  nextaction="connectSalesTeam" />
        <digit value="11" nextaction="connectDISA" />
        <digit nextaction="connectExtension" />
    </action>

    <action name="connectSalesTeam" method="callto">
        <destination>100</destination>
    </action>
Then, all these extensions will ring at the same time when caller press "1". You can upload your own 'aa.xml' file to virtual server to replace the default 'aa.xml' file.
3.3 Multi-menus and IVR_XML file
In previous scenario, we just establish a simple auto-attendant. It cannot support multi-levels voice menus. For example, if user press '1', we maybe want to continue prompt "Contact Asia market department, press 1; Contact Europe market department, press 2; ...".
It is very easy to provide multi-menus by editing IVR_XML service file 'aa.xml'.
For example, we can update this XML file to support above multi-menus.
    <action name="inputForMenu1" method="input">
        <digit value="1"  nextaction="menu2" />
    </action>

    <action name="menu2" method="playandwaitinput">
        <playaudio>
            <id>0a080002</id>
        </playaudio>

        <minnumofdigits>1</minnumofdigits>
        <maxnumofdigits>1</maxnumofdigits>
        <enddigit>#</enddigit>
    </action>

    <action name="inputForMenu2" method="input">
        <digit value="1" nextaction="contactAsiaMarket" />
        <digit value="2" nextaction="contactEuropeMarket" />
        <digit nextaction="menu2" />
    </action>

    <action name="contactAsiaMarket" method="callto">
        <destination>100</destination>
    </action>

    <action name="contactEuropeMarket" method="callto">
        <destination>101</destination>
    </action>
You can see it will be very easy to customize your own IVR process if you are familar with XML format. Please visit miniSIPServer IVR-XML standard for more details.
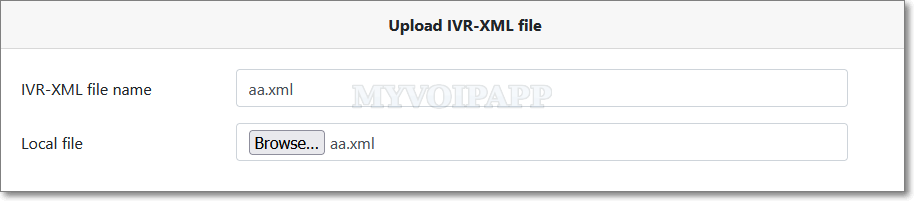
Please click menu "Profile / IVR-XML file" to upload your own IVR-XML files.
| Item | Description |
|---|---|
| IVR-XML file name | The file name must be '8+3' format. The suffix must be '.xml', the main file name must be characters or numbers and its length cannot be more than 8. |
| Local file | Local IVR-XML file to be uploaded to the virtual server. The file size must be less than 30KB. |
3.4 Different IVRs
Sometimes we need deploy different IVRs for different external lines or incoming calls. miniSIPServer can trigger different IVR according to different called number.
Please click menu "services / IVR services" to add different records to trigger different IVRs. Following figure describes a simple scenario: if the called number of incoming call is "111", IVR-XML file "aa_test.xml" will be loaded and triggered IVR process.
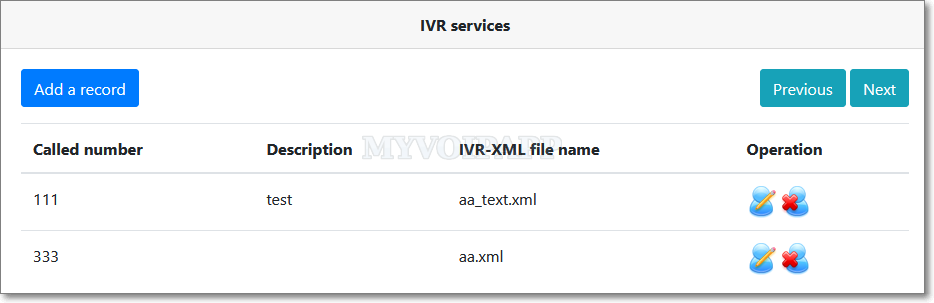
Please refer to following table for details about this configuration:
| Item | Description |
|---|---|
| Called number* | The called number of incoming call. miniSIPServer will trigger different IVR process according to different called number of incoming calls. |
| Description | Description of current record. |
| IVR-XML file name | IVR-XML file name, and its file has been uploaded to virtual server which is configured in above section. |